Build Your Own Self-Watering Containers: A Guide to Sustainable Gardening
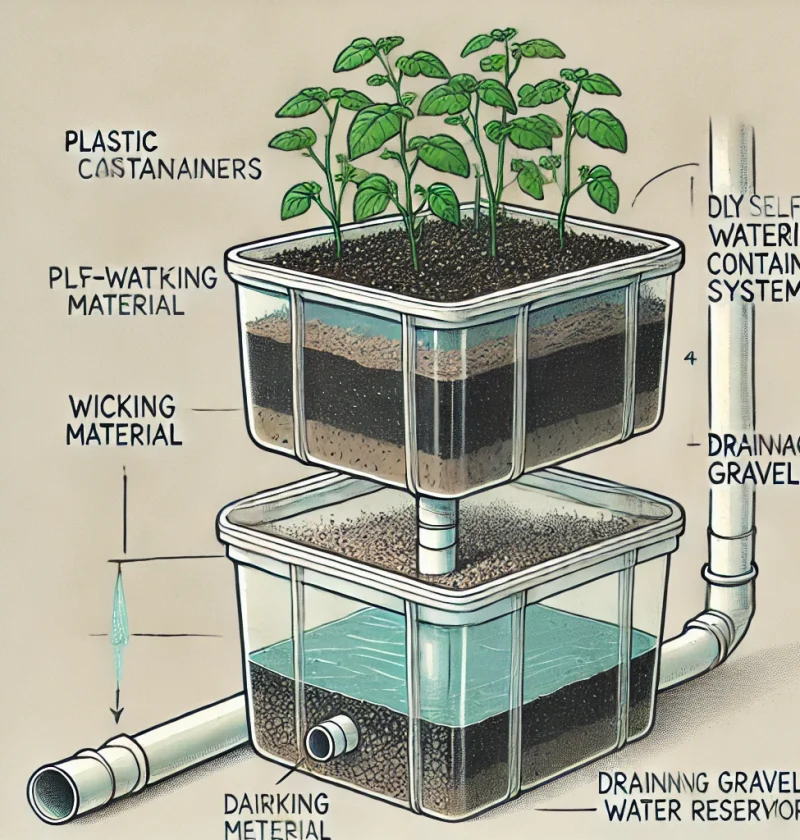
In today’s world, efficient water usage is crucial. Self-watering containers offer an innovative solution for gardening enthusiasts, providing consistent hydration for plants while conserving water. Here’s how you can create your own self-watering containers, step-by-step, with detailed guidance and materials needed.
—
Why Self-Watering Containers?
Self-watering containers are ideal for both beginners and experienced gardeners. They:
Save water by minimizing waste.
Provide consistent moisture to plants.
Reduce maintenance by extending watering intervals.
Promote healthy root growth and plant yield.
—
Materials Needed:
Before you begin, gather these essential materials:
Plastic storage containers (preferably with lids).
PVC pipe or tubing.
Drainage gravel or pebbles.
Potting soil.
Wicking material (cotton rope or felt fabric).
A water reservoir (another container or section within the same container).
Drill with drill bits.
Utility knife or scissors.
—
Step 1: Prepare the Containers
1. Choose your containers: Select durable plastic storage containers.
2. Drill drainage holes: For the soil container, drill small holes in the bottom to allow excess water to escape.
3. Reserve the reservoir: The second container will serve as the water reservoir and should remain intact without holes.
—
Step 2: Create the Wicking System
1. Cut the PVC pipe: Measure and cut the PVC pipe to match the height of your containers.
2. Prepare the wick: Thread a piece of wicking material (cotton rope or felt fabric) through the PVC pipe.
3. Position the wick: Ensure one end extends into the water reservoir and the other reaches the soil container’s bottom.
—
Step 3: Assemble the Container Layers
1. Add drainage gravel: Lay a layer of gravel or pebbles at the bottom of the soil container for aeration and water flow.
2. Insert the wicking system: Place the PVC pipe with the wicking material in the center of the container.
3. Add potting soil: Fill the container with high-quality potting soil, leaving space at the top for planting.
—
Step 4: Set Up the Water Reservoir
1. Position the reservoir: Place the water reservoir beneath the soil container.
2. Fill the reservoir: Pour water into the reservoir, ensuring the bottom of the wicking material is fully submerged.
3. Install a water level indicator (optional): To monitor the water levels easily.
—
Step 5: Plant and Maintain
1. Choose the plants: Select plants suited for container gardening. Herbs, tomatoes, and leafy greens work well.
2. Plant carefully: Place your plants into the soil and gently press around the roots.
3. Monitor and refill: Check the soil moisture regularly and refill the reservoir as needed.
—
Tips for Success
Use high-quality potting soil to ensure proper water retention and aeration.
Avoid overfilling the reservoir, as this could lead to root rot.
Place the container in a location with adequate sunlight for your plants.
—
Benefits of Self-Watering Containers
By building your own self-watering container, you:
Reduce your water bill by conserving water.
Spend less time watering your plants, allowing you to focus on other gardening tasks.
Create a sustainable gardening system that’s environmentally friendly.
—
Sustainability in Action
Self-watering containers are a step toward sustainable gardening. By reusing plastic containers and minimizing water waste, you contribute to a greener planet while enjoying the beauty of homegrown plants.
—
Discover the Joy of Self-Watering Gardening!
Building self-watering containers is easy, affordable, and incredibly rewarding. Start today and transform your gardening routine into an eco-friendly and efficient practice.


