1. **Choose the Location**: Select a shaded spot in your garden that is easily accessible. The area should have good drainage to prevent waterlogging.
2. **Prepare the Site**: Clear the area of grass, weeds, and debris. You want a clean surface for the worm farm.
3. **Dig the Trench**: Dig a trench or pit about 2-3 feet deep and 2-3 feet wide. This will serve as the home for your worms.
4. **Add Bedding**: Layer the bottom of the trench with bedding materials like shredded cardboard, newspaper, or dried leaves. This will provide a comfortable habitat for the worms.
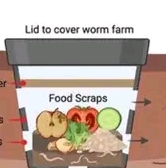
5. **Add Food Scraps**: Layer kitchen scraps such as fruit and vegetable peels, coffee grounds, and crushed eggshells on top of the bedding. Avoid meat, dairy, and oily foods to prevent odors and pests.
6. **Introduce the Worms**: Add red wiggler worms (Eisenia fetida) to the trench. These worms are ideal for composting and will help break down the organic material.
7. **Cover the Farm**: Cover the trench with a layer of soil and add a light mulch of leaves or straw to help retain moisture.
8. **Maintain the Worm Farm**: Keep the soil moist but not soggy. Regularly check on the worms and add more food scraps as they consume the initial offerings.
9. **Harvest the Compost**: After a few months, your worms will have transformed the organic matter into rich compost. Gently dig out the compost from the trench and use it in your garden.
10. **Replenish**: Replenish the worm farm by adding more bedding and food scraps to keep the worms thriving.


