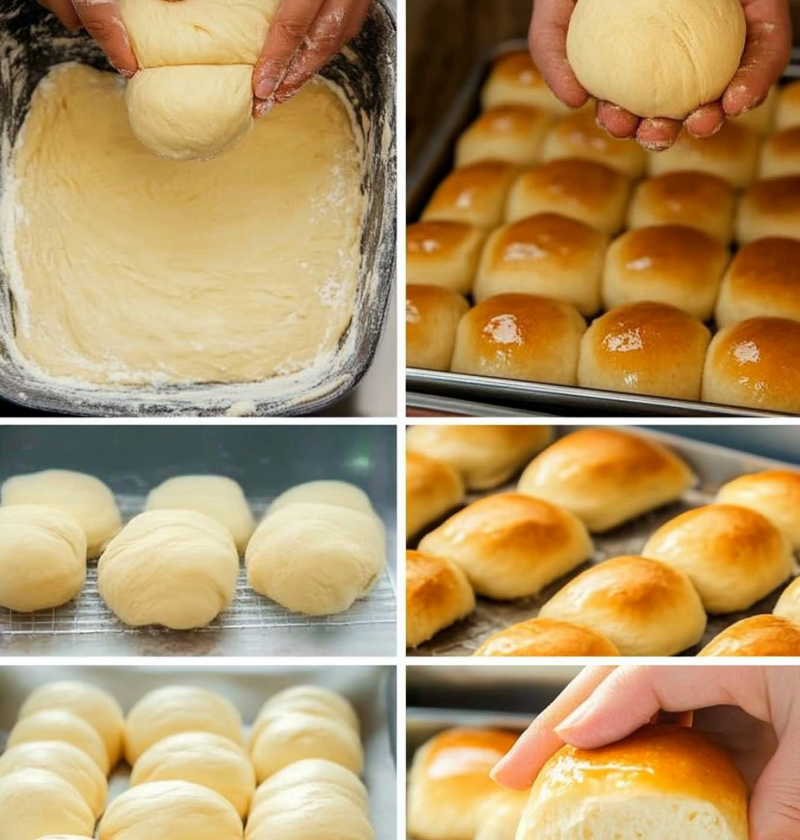
Indulge in the Art of Baking: Crafting the Perfect Milk and Butter Bread
There’s an unparalleled joy in baking homemade bread, especially when it results in a loaf that’s soft, fluffy, and rich in flavor. This guide will walk you through creating a delectable milk and butter bread, a staple in many cultures, known for its tender crumb and buttery aroma.
Ingredients:
- 4 cups (500g) all-purpose flour
- 1 cup (240ml) whole milk, warmed
- 1/4 cup (60g) unsalted butter, softened
- 1/4 cup (50g) granulated sugar
- 2 1/4 teaspoons (7g) active dry yeast
- 1 teaspoon salt
- 1 large egg, at room temperature
Instructions:
- Activate the Yeast:
- In a small bowl, combine the warm milk and sugar. Stir until the sugar dissolves.
- Sprinkle the yeast over the milk mixture and let it sit for 5-10 minutes until it becomes frothy, indicating the yeast is active.
- Prepare the Dough:
- In a large mixing bowl, combine the flour and salt.
- Add the softened butter and rub it into the flour mixture until it resembles coarse crumbs.
- Pour in the yeast mixture and the beaten egg.
- Mix until a shaggy dough forms.
- Knead the Dough:
- Transfer the dough to a lightly floured surface.
- Knead for about 10 minutes until the dough becomes smooth and elastic.
- Alternatively, use a stand mixer with a dough hook attachment on medium speed for 5-7 minutes.
- First Rise:
- Shape the dough into a ball and place it in a greased bowl, turning it to coat all sides.
- Cover with a damp cloth or plastic wrap.
- Let it rise in a warm, draft-free area for 1-2 hours, or until it doubles in size.
- Shape the Loaf:
- Punch down the risen dough to release any air bubbles.
- Transfer it to a lightly floured surface and shape it into a loaf.
- Place the shaped dough into a greased 9×5-inch loaf pan.
- Second Rise:
- Cover the loaf pan with a damp cloth or plastic wrap.
- Allow the dough to rise again for 30-45 minutes, or until it reaches about an inch above the rim of the pan.
- Bake:
- Preheat the oven to 350°F (175°C).
- Once preheated, bake the bread for 30-35 minutes, or until the top is golden brown and the loaf sounds hollow when tapped.
- Cool and Serve:
- Remove the bread from the oven and let it cool in the pan for 10 minutes.
- Transfer the loaf to a wire rack to cool completely before slicing.
Tips for Success:
- Milk Temperature: Ensure the milk is warmed to about 110°F (43°C). If it’s too hot, it can kill the yeast; too cold, and the yeast won’t activate properly.
- Butter Incorporation: Softened butter integrates more easily into the flour, leading to a more uniform dough.
- Kneading: Proper kneading develops gluten, which gives the bread its structure and chewiness.
- Proofing Environment: A slightly warm, humid environment is ideal for dough rising. If your kitchen is cold, consider placing the dough in an oven with the light on or near a warm appliance.
Serving Suggestions:
- Breakfast Delight: Toast slices and spread with additional butter and jam for a delightful morning treat.
- Savory Sandwiches: Use this bread as a base for sandwiches, pairing well with cheeses, meats, and fresh vegetables.
- French Toast: Its soft texture makes it perfect for soaking up egg mixtures for a rich and indulgent French toast.
Baking bread at home is a rewarding experience that fills your kitchen with comforting aromas and results in a product that surpasses any store-bought loaf. This milk and butter bread, with its tender crumb and rich flavor, is sure to become a household favorite.
Nutritional Information (per slice):
- Calories: 180
- Carbohydrates: 30g
- Protein: 5g
- Fat: 4g
- Fiber: 1g
- Sugar: 3g
Frequently Asked Questions:
- Can I use bread flour instead of all-purpose flour?
- Yes, bread flour has a higher protein content, which can result in a chewier texture. The bread may also rise higher due to increased gluten development.
- How do I store the bread?
- Store the cooled bread in a plastic bag or airtight container at room temperature for up to 3 days. For longer storage, consider freezing slices and toasting them as needed.
- Can I add other ingredients to the dough?
- Absolutely! Incorporate ingredients like raisins, nuts, or herbs during the mixing stage for added flavor and texture.
- What if I don’t have a loaf pan?
- You can shape the dough into a free-form loaf and bake it on a baking sheet. Keep in mind that the baking time may vary.
- Why did my bread turn out dense?
- Several factors can cause dense bread: insufficient kneading, not allowing the dough to rise fully, or using expired yeast. Ensure your yeast is active and give the dough ample time to rise.
Embarking on the journey of bread-making can be both therapeutic and gratifying. This milk and butter bread recipe offers a straightforward approach to creating a loaf that’s both delicious and versatile. Happy baking!


